Podcasting can be simple.
Honestly, with the right approach, you can remove most of the tech stress from the process. Instead of worrying about normalisation, noise reduction, compression or bitrates, why not let a fancy computer brain take care of it for you?
Well, let’s delve into one way to do exactly that. Ready to take a look at how to make a podcast with Alitu, the Podcast Maker app? Let’s go!
What is Alitu?
Here’s what you get:
🎙️ Record your podcast: online call recording & solo clips
🧽 Automated Audio Cleanup: noise reduction, levelling, EQ & more
🔧 Automated Production: adds theme music, transitions & all your segments
✍️ Automated Transcription: full text copy of your show to publish anywhere
✂️ Assisted Audio Editing: an editing tool built to help podcasters specifically
🌍 Podcast Hosting: Publish your show, with full download statistics
Alitu is a web-based app which aims to make it as easy as humanly possible for you to create a podcast, from recording, to editing, to publishing.
You start by uploading your audio, or recording a call right into the app.
Then, Alitu cleans up your audio, performing processes like noise reduction and volume levelling, before popping it into the episode builder.
You can set up your theme music so it’s added automatically. Fades are added between sections, and you can drag and drop in regular clips, such as adverts or segment intros. You can edit clips here, too, to remove any mistakes.
When you click ‘Preview My Episode’, Alitu creates your final file, perfectly optimised in the right format for podcasting, and you can publish it directly from inside your Alitu account and push it out for the world to hear.
Alitu also gives you the option to download your shiny new episode and then publish it to your hosting platform of choice. You don’t need to use Alitu’s own hosting if you don’t want to 🙂
What Makes Alitu Unique?
Alitu is unique because it simplifies the process, but also offers you as much control as possible over the content and the distribution. So, while some podcast maker tools handle hosting, too, and really cut down on editing options, Alitu gives you control over both.
For example, Alitu has a full editing tool – simplified and podcast specific, compared to normal audio editors.
And for publishing, it has its own hosting built-in, or, links directly to nearly all of the most popular podcast hosting platforms. Even if your favourite host isn’t listed, it’s super simple to download your finished episode, from Alitu, and then upload it directly.
Alitu can also save you a lot of time in the editing phase because you can listen back through recordings at up to double the speed. That means if you’re combing through an hour-long interview to find bits to chop out, it’ll literally take you half the time!
One final feature, loved by many Alitu users, is the ‘video export’ option, where you can create a video version of your episode, right inside the app. An image, a title and a moving waveform are laid over your audio, so you can use it on YouTube, or any other social platform.
What’s New With Alitu in 2022?
New features for podcasters are being added to Alitu all the time. It’s in a constant state of enhancement and improvement 🙂
Two of the latest features we’re really excited about are hosting and transcription.
- Podcast hosting – now you can have one single place to record, edit, publish, and distribute your show.
- Alitu will transcribe your episodes for you – a much-requested feature, now in Beta, that’s essential for accessibility, discoverability, and growth!
How to Make a Podcast Episode in Alitu
Let’s take a look at the process, to show you how Alitu works. Nothing like a proper case study to give you the full rundown!
Here’s my episode plan, for today:
- Episode intro – just me, recording solo
- Main content – guest interview via online call
- Sponsor slot
- News segment – me and a co-host, recording in person
You might not need to do all of these, but it’ll help me show you all the different ways there are to get audio into Alitu. Let’s get making!
Step 1: Recording My Interview
So, I start by scheduling a call with my guest and sending them an Alitu call recording link.
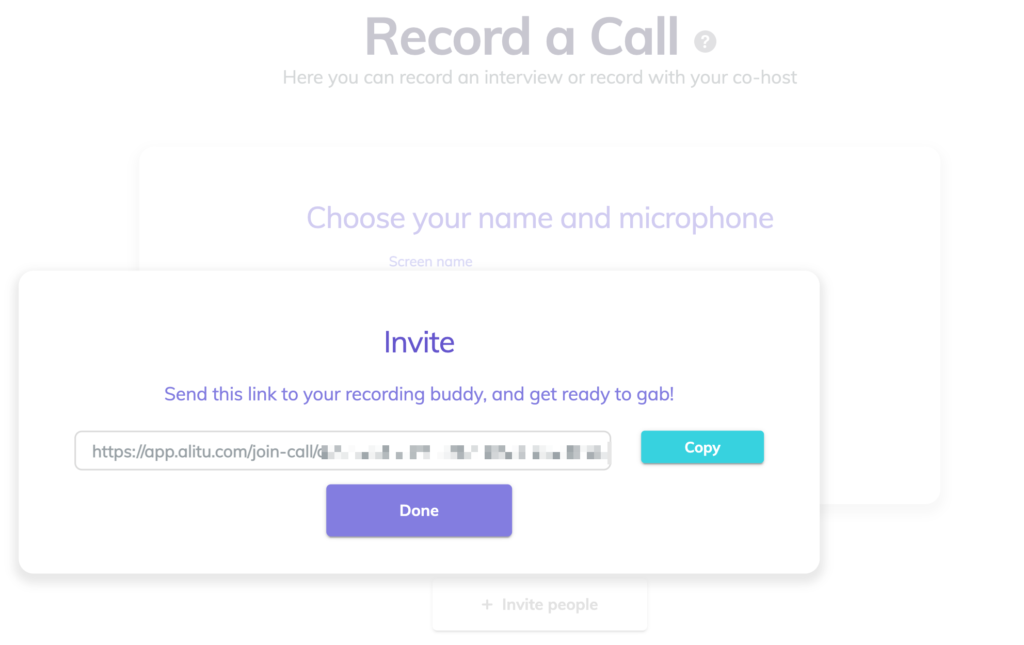
At the right time, I pop onto the link, as do they, and I see the call recording screen, like so:

Here, I can record my call, with all the normal features you’d expect. I can mute my mic if I need to. I can get the invite link again, to invite more people. I can lock the room, so no one else can enter. And I can type things into the call chat if I need to share some written info with my guest.
Once the call’s done, I hit ‘End Call’ and the recording is finished up. At this point, Alitu will clean up the recording – applying noise reduction, volume levelling, hum reduction – and pop it into my library for use in any episode in future.
Step 2: Creating the Episode
Now, I’m ready to put the episode together. So, I click ‘Add an Episode’ on the Alitu dashboard. This takes me to the episode details screen. This set the ID3 tags for the episode, and the info carries over onto your Podcast hosting platform, once you publish.
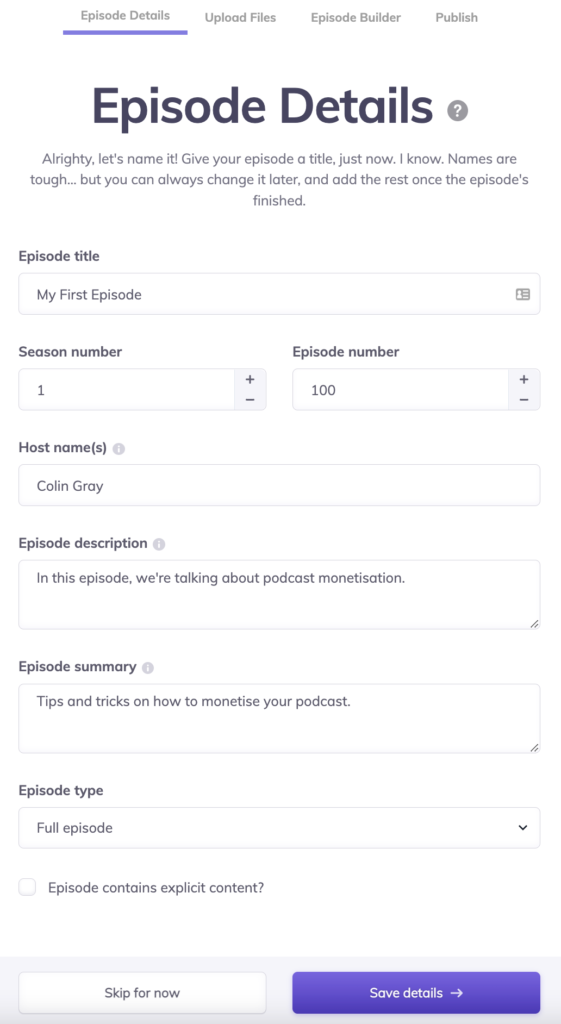
If you don’t have this all ready right away, though, you can add it or change it later, so let’s move along!
Next, we add our recordings to the upload screen. This is where we put clips into the app, in various different ways. The first option is to upload directly, as you’ll see below.

But clicking ‘Add Your Audio’ shows the other methods, including recording into the app and adding from your library.

So, I can start by adding my call recording, from above, into the episode first. I click ‘add’ above, on the latest call recording. In the library, you can rename these files, so you can make them a bit easier to find and keep a track of, too.
Next, I want to record my episode intro right into the app. I’ve got a bullet point script I made for this, based on the call we recorded, so I pull out the script and hit record.

Final one, I upload a pre-recorded news segment, made using my Tascam DR05, in person, with a friend. To do that, I just click on the upload box, and select the file from my computer, or drag it right from my desktop into the Alitu window.

You can do this with any externally recorded clip, from a Zoom call to a conference presentation, and Alitu will clean it up and add it to your episode, just like the rest.
At this point, you can even merge clips, if you happen to have a recording which is split for each participant. You often get these from double-ender type tools, which record each speaker separately. As long as the clips are synchronised (meaning each is the same length and the speakers are in sync) Alitu can clean them up separately, and join them together for you.
Now, I click upload, and the files are all on their way into Alitu, to be cleaned up!
Step 3: Episode Builder for Music & Extra Clips
The episode builder is where you add theme music, rearrange your clips and add any regular clips from your library (such as adverts, segment intros, music transistions, etc). You can also access editing, here, but I’ll show you that next.
For the episode builder, you can see that my theme music has been added automatically and a fade is added from music to voice, both for the intro and outro music. You can edit the music length and fade length using the little round fade icons. And, you can add new clips to the timeline using the + icon.

So, I’ll start by adding my sponsor slot for the week. I recorded that weeks ago since it’s running on my show for two months. I just add it in from my library, then, I can drag it into the right position. I can also add our musical transition for the new segment in the same way, so I end up with seven clips on the timeline.
And that’s the episode constructed. Music is added, fades are in, and all clips are included. Almost ready to publish!
But, first, there were a couple of things I need to edit out…
Bonus: Free Music Library
Quick Aside: It’s worth noting that Alitu includes a big free music library which all Alitu members can use within their podcast, with no limit. Each track has a number of variations, including full-length theme music and short two to ten-second transition clips, stings or bumpers. There’s even a loop, for each track, so you can create voiceovers with a music bed behind it of any length.
Step 4: Editing out Silence & Mistakes
When I was recording my call, I know we had a bit of a chat at the start, to introduce each other, and then again at the end, when I thanked the guest for coming on. I want to edit these out.
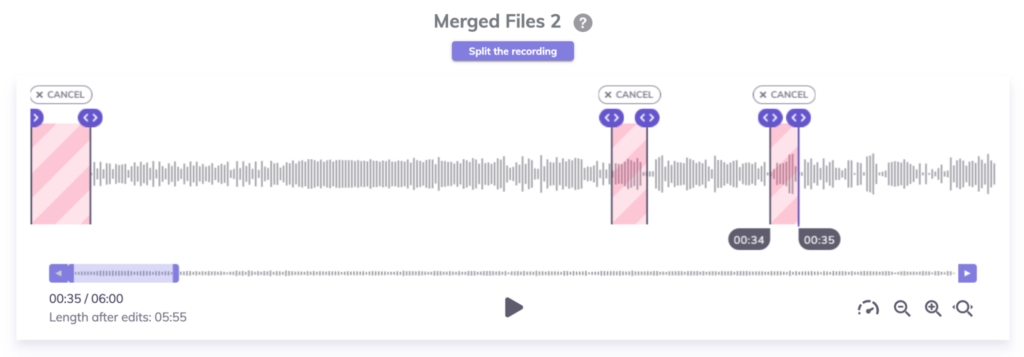
So, I find the call recording on the episode builder and click edit. This is what I see.

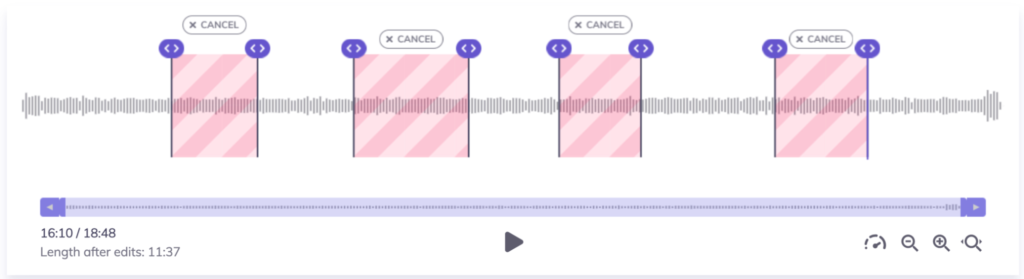
I can easily click around on the clip and play any part, to find the sections I need to edit. I can zoom in for the detail, and then I click and drag to select sections to edit out.

This is commonly used to edit out the silence at the start and end of each clip, as well as any big mistakes within a recording, or noises, silence, etc.
The end result, after you’ve made a few edits, might look like this.
To finish up, click ‘Save all Edits’ and you’re taken back to the episode builder. Now that we’re finished editing, we can export the episode!
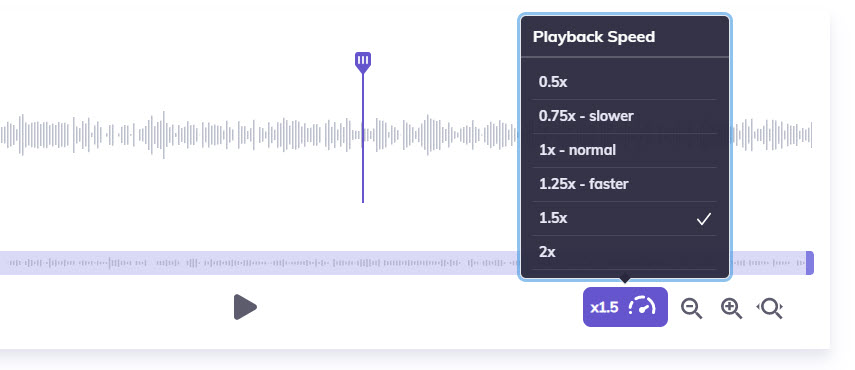
Remember, too, that you can listen back through any audio file in Alitu at 1.25x, 1.5x, or even 2x speed. This means you can edit your show in half the time it would take with most other audio production packages!
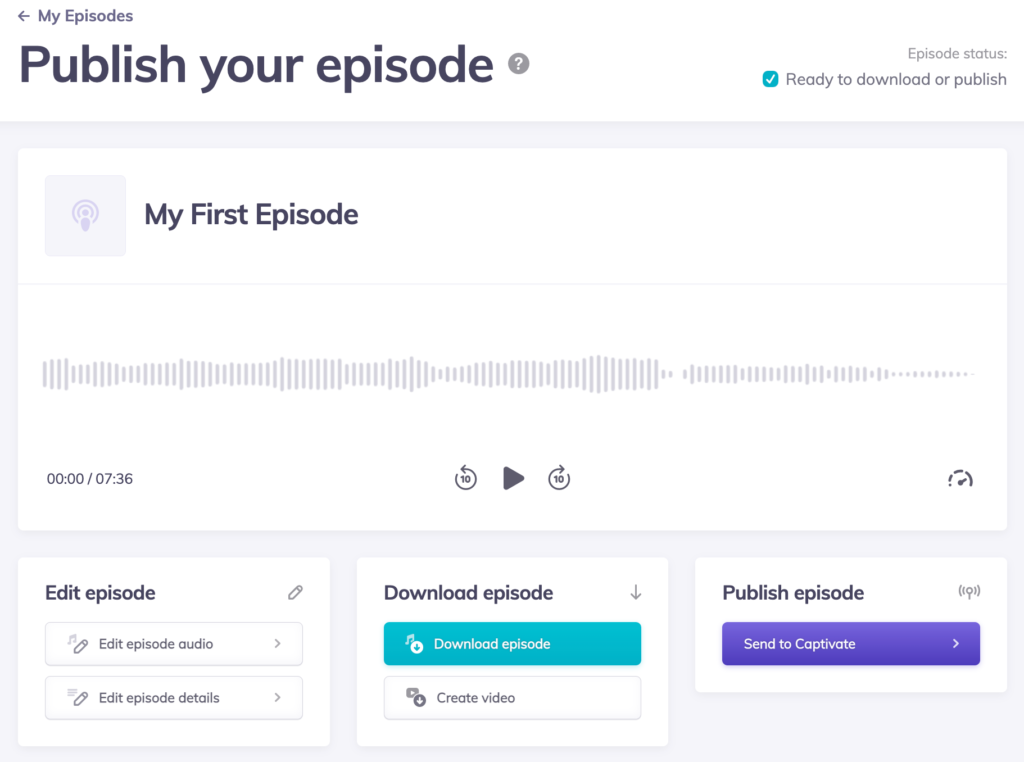
Step 5: Publishing Your Episode
You have a few options when it comes to publishing.
Alitu has its own podcast hosting built in, which includes everything you need, from full download stats to a hosted podcast website.
Or, you can also connect to a bunch of the most popular hosting sites, as shown in the screenshot below.

Once you’re connected up, then a ‘Publish to XYZHost’ button appears below the preview player, and you can publish with just a few clicks using that.
If you’re wondering about hosting, you can check out our favourite podcast hosting platforms here.

So, now, I’ll just click ‘Publish with Alitu’ and send the episode right over. Done!
Alternatively, I can download my finished episode, and upload it anywhere else I like. This is useful if you use a hosting platform that Alitu hasn’t integrated with yet, or you want to publish elsewhere, like Soundcloud.
Finally, there’s the option to publish a video version of the episode, using the ‘Create Video’ button. This produces a visual version of your episode by adding a background image, your title and a moving soundwave. You can publish this to YouTube or even make a video podcast.
New: Alitu Will Transcribe Your Podcast Episodes
Providing written episode transcriptions is an essential part of your show’s accessibility and growth. Podcast transcription can be expensive, though, and you can easily end up paying upwards of $20 per episode.
The good news? Alitu will now automatically generate transcripts for you, at no extra cost. This is yet another feature we’ve been excited to add to Alitu’s many offerings, and the feedback has been great so far.
Summary: How to Make a Podcast in Alitu
And there you have it! How to make a podcast episode in as little time and with as little stress as possible, using Alitu.
Get a 7 Day Free trial of Alitu now
Here’s a summary of what Alitu does to help you make your podcast:
- Audio cleanup, including noise reduction, hum reduction & levelling.
- Upload external recordings, including double-ender clips
- Record yourself or a call, right inside the app, ready for editing
- Adds theme music and fades
- Free music library, with full-length tracks, stings & loops
- Add a teaser clip before your theme music
- Edit podcasts in half the time by changing the playback speed
- Create pro-sounding music-backed clips using the Music Clip maker
- Access your library of regularly used clips, such as ads or segment intros
- Podcast specific audio editor to remove silence & mistakes
- Split clips to insert another in-between
- Add id3 tags/metadata and send that to your host
- Creates the final file – correct format, bitrate and standard loudness
- Transcription – auto-generates a written transcription of your episode
- Publish direct to your hosting provider (including Buzzsprout, Captivate, Transistor, & more)
- OR, host your podcast via Alitu’s dedicated podcast hosting
- Create a video version of your podcast for YouTube and elsewhere
And remember, if you’re still at the stage of launching your show, then be sure to check out our full How to Start a Podcast guide. That’ll take you through everything else you need to know, from planning, to equipment, to promotion.